Plexiglass is a versatile, lightweight, and durable material with widespread applications. You’ll find the plastic in windows, display cases, signs, protective barriers, and many more items across professional as well as DIY projects.
That’s where cutting plexiglass is necessary for a custom fit to specific DIY dimensions and designs. Precise cutting is mandatory to maintain the overall integrity of plexiglass. This blog explores the essential cutting methods for a flawless cut like a professional.
What Makes Plexiglass Unique?
Plexiglass also goes by Perspex, acrylic glass, and Plexiglas. The acrylic plastic features an impressive combo of durability and appeal. Its transparency is directly comparable to glass, offering up to 92% light transmission.
The density is about 50% less than traditional glass, making it a favorite for applications involving visual clarity and reduced weight. That’s why plexiglass windows, display cases, and signage boast superb weather resistance against harsh outdoor conditions.
Beyond these foremost characteristics, plexiglass is also incredibly flexible. You can mold the plastic into various shapes upon heating. It makes the plastic a shatterproof substitute to glass for customized designs.
In addition, it’s a cost-effective alternative to glass while offering similar aesthetics at lower price points. Despite its light weight, acrylic glass demonstrates sufficient strength and impact resistance, making the plastic a reliable option for protective enclosures.
Challenges in Cutting Plexiglass
As you should understand by now, plexiglass comes with remarkable properties. However, its cutting process can present significant challenges. One primary concern is associated with its brittleness.
Improper handling or unsuitable tools can easily lead to cracks, chips, or fractures. The material is prone to heat buildup during cutting, which causes melting and deformation at the edges. Uneven cuts and rough finishes are common when the techniques or tools aren’t precise.
That’s where cutting Plexiglass requires specialized tools and methods tailored to its properties. For instance, employing a fine-toothed blade can minimize chipping. Meanwhile, cooling techniques, like applying water or air, can prevent heat-related damage.
Proper preparation, including securing the material and marking accurate guidelines, also plays a key role in ensuring a precise and clean cut. Understanding the unique attributes should drive your approach to professional results.
Essential Tools for Cutting Plexiglass
A. Standard Cutting Tools
- Utility Knife: It’s ideal for lightweight tasks and thin plexiglass (about 1/8 inch or less). A scoring knife is precise for straight cuts on smaller projects. Scoring the sheet multiple times with a box cutter allows easy snapping.
- Circular Saw: It’s suitable for larger projects or thicker acrylic. The setup has a fine-toothed blade for clear acrylic sheets. Maintaining a steady cutting pace is obligatory to avoid overheating or melting the plastic.
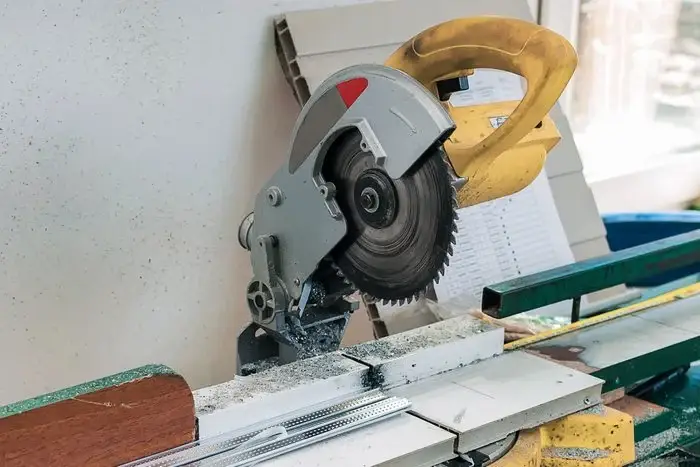
- Table Saw: It’s the go-to option for highly accurate and straight cuts. Proper saw blade selection (fine teeth or carbide-tipped blades) is crucial. Only then, a table saw can deliver top-quality results, even on thick plexiglass.
- Jigsaw: It’s perfect for making curved cuts or intricate shapes. The saw is equipped with a fine-tooth blade. That’s how a jigsaw offers versatility and precision. A slow and steady speed is mandatory to prevent chipping.
- Handsaw: It’s another practical choice for manual cutting, especially on thinner plexiglass. It demands more manual effort and a certain degree of expertise. Still, a handsaw can definitely offer clean cuts with careful use.
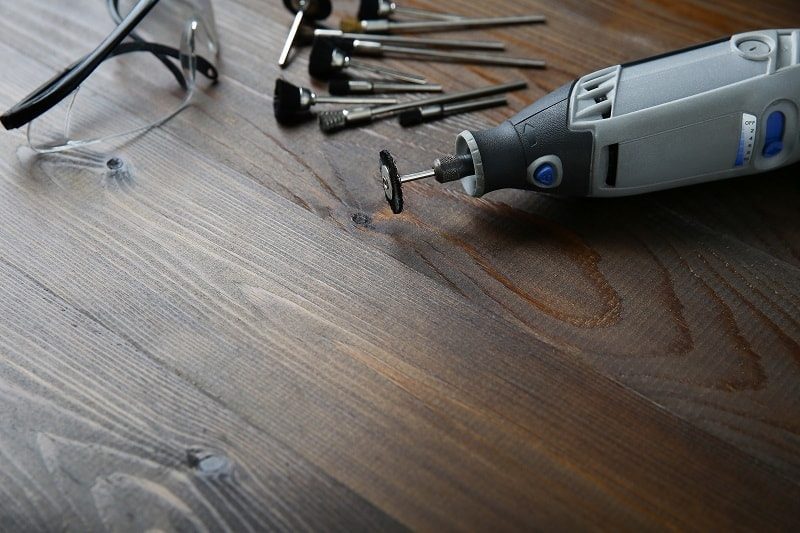
- Dremel Tool: It’s a rotary tool for detailed cutting tasks. The same size goes for handling small yet intricate plexiglass pieces. The versatile equipment is capable for a cut portion, engravings, and smoothing out rough edges.
B. Measuring and Marking Tools
- Tape Measure/Steel Ruler: Always ensure accuracy with a deep groove. A metal ruler is beneficial for marking every straight line.
- Pencil or Marker: Use a pencil for light and erase-able marks. Alternately, choose a dry erase marker for clearly visible straight lines on a protective film.
- Clamps: Secure the plexiglass to a stable work surface to prevent movements during cutting. It can minimize errors and accidents.
- Edge Guides: It’s essential with tools like jigsaws or circular saws for straight cuts. Such guides can help maintain consistency regarding precision.
Preparing Plexiglass for Cutting
a. Sheet Thickness
Selecting the appropriate sheet thickness is critical in preparing plexiglass for cutting. Standard thicknesses include 1/8-inch and 1/4-inch sheets based on project requirements. Light applications like picture frames or DIY tasks can rely on thinner sheets (1/8-inch).
In contrast, thicker sheets (1/4-inch or above) are suitable for durable projects like protective shields, aquariums, or architectural designs. Understanding the material in the final phase helps to avoid waste for optimal performance.
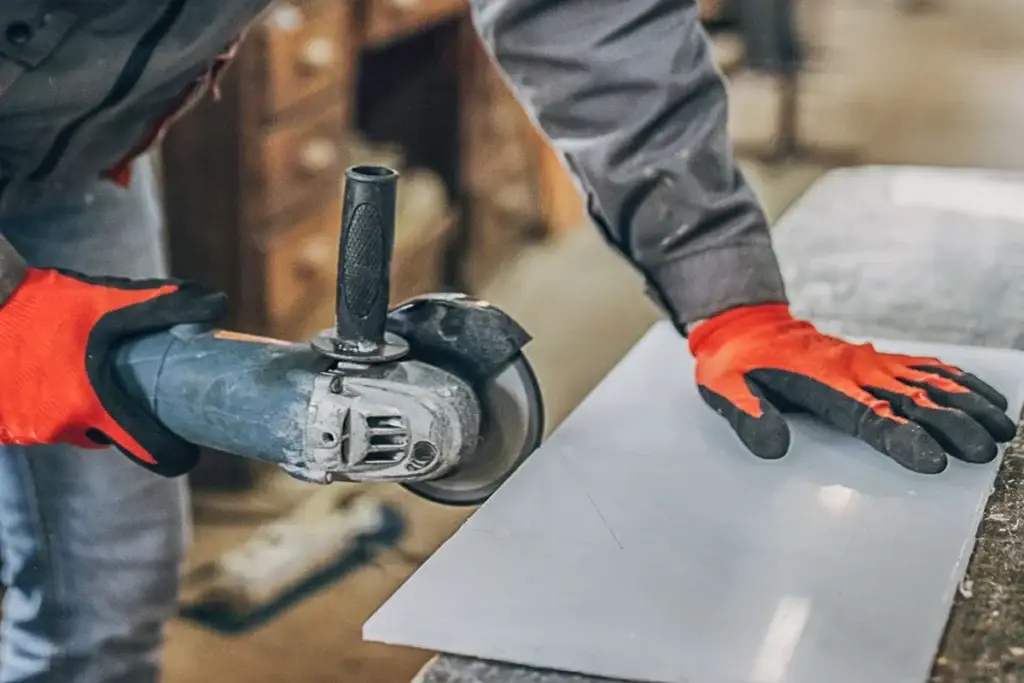
b. Safety Precautions
Prioritizing your safety is a must-follow factor while working with plexiglass. Cutting can produce debris and fine particles. Upon inhalation, they can pose serious risks to the eyes, skin, and respiratory system.
Always wear safety glasses to shield your eyes, gloves to protect your hands, and a dust mask to prevent inhalation. For indoor cutting, maintain ventilation to dissipate heat and fumes effectively. Such precautions can create a safe environment conducive to a successful cutting process.
c. Surface Protection
Preserving the integrity during cutting is highly overlooked across at-home cutting. Consider applying masking or painter’s tape along the cutting line to minimize the risks of chipping and cracking. It cushions the material against the immense tool vibrations.
Moreover, placing the plexiglass on a soft work surface like foam, cardboard, or wood provides stability. It also prevents scratches or damage to the underside. Securing the plastic with clamps further keeps the sheet stationary during cutting.
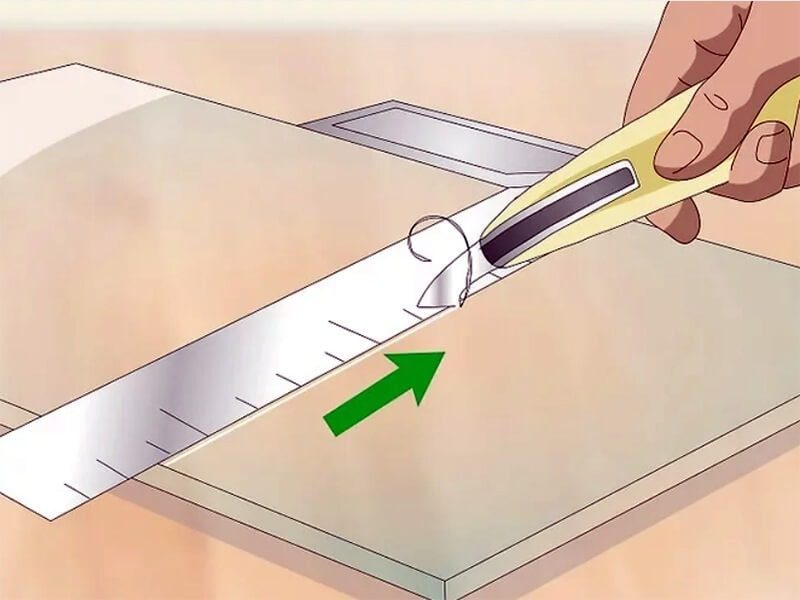
Technique 1: Utility Knife or Scoring Knife (for Thin Plexiglass)
A scoring knife, box cutter, or utility knife is an effective cutting tool for working with thin sheets (1/8″ or less). You can achieve a clean cut with minimal effort.
- Step #01 – Measure and Mark the Cutting Line: Determine the dimensions first. Use a tape measure or metal ruler for exact measurements. Mark the cutting line using a pencil or permanent marker.
- Step #02 – Apply Masking Tape Along the Line: Prevent chipping or cracking by masking or painter’s tape along the cutting line. It provides stability through reduced sheet vibrations.
- Step #03 – Score the Plexiglass with the Utility Knife: Secure the acrylic on a foamy or wooden surface to prevent scratches. Score the marked line with a glass cutter to make several passes with uniform pressure.
- Step #04 – Snap the Plexiglass Along the Scored Line: Gently lift and position the scored line over the edge by the opposite side of a steady work surface. Hold it firmly to apply sharp downward pressure for snapping.
Technique 2: Circular Saw (for Straight Cuts on Thicker Sheets)
Working with thicker plexiglass calls for power tools like a circular saw for professional cuts. The steps involved in sawing the material properly include –
- Step #01 – Secure the Acrylic with Clamps: Place the plastic on a stable work surface to prevent movements. Use clamps to hold the sheet securely. But avoid over-tightening that may create stress points.
- Step #02 – Set Up the Saw with a Fine-Toothed Blade: Equip the circular saw with a fine-toothed blade designed for acrylic plastics. It minimizes chipping to deliver a clean and straight edge.
- Step #03 – Mark Your Cut and Align the Saw: Accurately measure and mark the cut line using a tape measure or steel ruler. A pencil or permanent marker works well for creating visible guidelines.
- Step #04 – Cut Along the Line with Moderate Speed: Begin cutting along the marked line at a steady and moderate speed. Skip excessive speed or force to avoid overheating to melted edges.
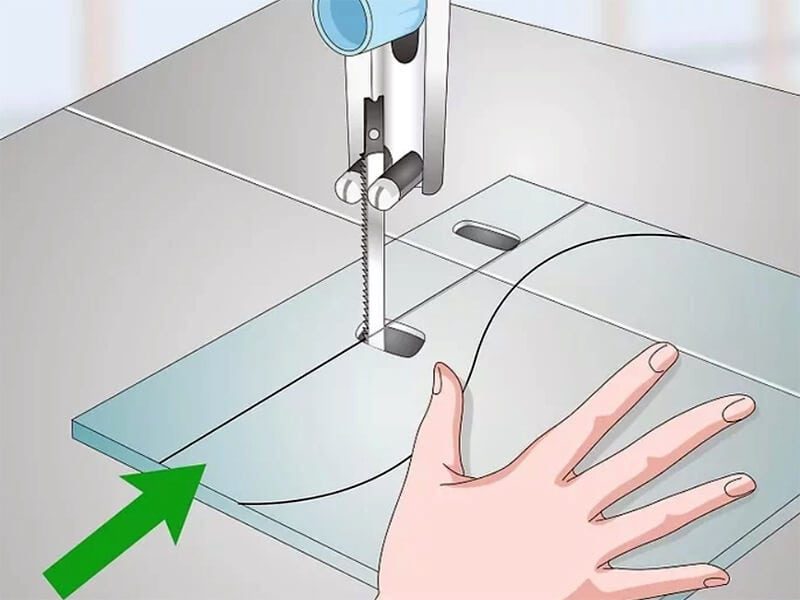
Technique 3: Using a Jigsaw (for Curved Cuts on a Plexiglass Sheet)
Your project may require intricate shapes or curved cuts more often. And a jigsaw is the ultimate choice due to its versatility and precision.
- Step #01 – Clamp the Plexiglass to a Flat Surface: Place the plexiglass on a firm, stable work surface. Secure the material using clamps to prevent movements during cutting. Consider placing a layer of foam or wood underneath the surface for further protection.
- Step #02 – Mark the Curved Lines with a Pencil: Use a tape or ruler to measure and outline the desired curves with a pencil or marker. Draw the lines directly on the cover for plexiglass with a protective film. Take your time to make every curve exact.
- Step #03 – Use a Fine-Toothed Jigsaw Blade at Low Speed: Equip your jigsaw with a fine-toothed blade to cut acrylic or plastics. It ensures minimal for a smoother finish. Set the jigsaw’s speed to low, as higher speeds can generate excessive heat, causing distortion.
- Step #04 – Carefully Guide the Jigsaw Along the Curve: Position the saw at the starting point and cut slowly and steadily. Avoid rushing and/or applying too much force. Let the jigsaw do the work to maintain smooth and consistent movements for clean cuts.

Technique 4: Using a Table Saw (for Precision and Straight Cuts)
A table saw feels like the absolute choice when precision and straight cuts are critical. Table saws are Known for accuracy and ability to handle thicker plexiglass sheets.
- Step #01 – Secure the Plexiglass with a Clamp: Place the plexiglass on the saw’s cutting table. Secure the material firmly using clamps to prevent vibrations, leading to uneven cuts or cracks.
- Step #02 – Set the Right Blade Height and Angle: Equip the table saw with fine teeth or carbide tips designed for plastics. Adjust the blade height to extend it slightly above the thickness.
- Step #03 – Slowly Feed the Plexiglass with Even Pressure: Carefully feed into the blade along marked lines. Employ a steady pace to apply consistent pressure without forcing on the power saw.
- Step #04 – Follow the Marked Lines for a Precise Power Drill: Focus on the marked guidelines to keep the blade aligned with the cutting path. It prevents deviations that could compromise overall accuracy.
Technique 5: Using a Dremel Tool (For Intricate or Detail Work)
A rotary tool provides excellent control and versatility. That’s why it’s an ideal option for projects with complex shapes or fine cuts.
- Step #01 – Secure the Plexiglass Piece in Place: Stabilize the plexiglass on a soft yet sturdy surface (foam or wooden board). Use clamps for a firm holding to allow zero movements. Also, protect the plexiglass from scratches with protective padding under the clamps.
- Step #02 – Attach a Cutting Wheel to the Dremel Tool: Select a cutting wheel designed for plastics or acrylics for smoother cuts with minimal chipping. Carefully fasten the cutting wheel to the Dremel tool. Inspect it for any wear or damage to avoid uneven cutting.
- Step #03 – Proceed Along the Cut Line with Control: Measure and mark the desired cutting lines or intricate designs with a pencil or permanent marker. Power up and position the wheel at the starting point to guide the Dremel tool along the lines in a steady hand.
What About Laser Cutting? Why It’s Not as Simple as It Looks?
It’s a precise and advanced method of shaping plexiglass using high-powered laser beams. The technique has widespread adoption across industries due to its ability to produce intricate designs with supreme accuracy and minimal waste.
One particular benefit concerns clean and smooth finishes upon cutting. It eliminates extensive post-cutting (sanding or polishing). Its versatility goes well with intricate patterns, complex curves, and even engraving in high-quality professional projects.
i. Complexity of Laser Cutting
Although laser cutting seems straightforward, it comes with significant complexities. Laser cutters need specialized equipment and training to operate effectively. The settings (power, speed, and focus) must be precisely calibrated for different plexiglass types and thickness levels.
Incorrect calibration can result in burned edges, material warping, or incomplete cuts. The unique thermal properties of plexiglass make laser cutting tricky. The heat generated by laser beams can cause localized damage. It also involves higher costs due to the sophistication involved.
ii. When to Choose Laser Cutting?
Laser cutting suits projects requiring intricate designs, delicate patterns, or high precision. Plexiglass projects may involve engraving logos, creating complex shapes, or having a professional finish. That’s when laser cutting becomes an excellent option.
However, relying on experienced professionals specializing in laser cutting is advisable. Professional services ensure the machinery is operated correctly and the settings are optimized for exact product specifications.

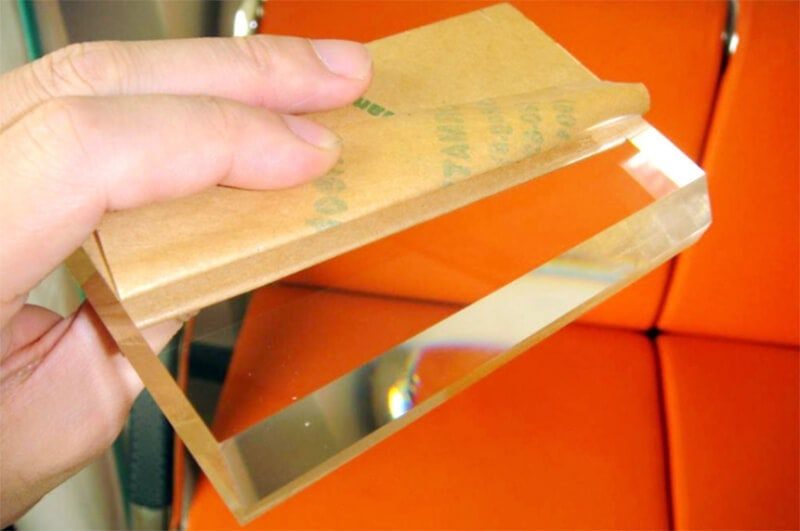
Post-Cutting Steps: Smoothing and Polishing the Edges
The edges often appear rough or uneven after the cutting. It can compromise the final aesthetics and safety. Enhance the appearance with a polishing compound through the following measures.
- Sanding the Edges: Select fine-grit sandpaper within 400 – 600 grit to refine rough surfaces. For heavily uneven edges, start with medium-grit sandpaper (200 – 300 grit) to progress to finer grits.
Hold the sandpaper gently against the edges to use consistent and circular motions. Continue sanding until the edges feel smooth to the touch. Consider attaching the sandpaper to a rubber sanding block for thicker sheets.
- Polishing the Edges: Apply a small amount of perfect polish to a soft microfiber cloth. Buff the edges of the plexiglass in a gentle and circular motion. It should initiate an evenly spaced polish.
Use a heat gun a few inches away from the edges and move it steadily along the surface. The heat gently melts and smooths the straight edge for a seamless look. Don’t overheat the plastic; it may lead to warping or discoloration.
Common Mistakes to Avoid
- Overheating: It’s one of the most frequent issues as plexiglass is prone to melting or cracking. It may occur due to high blade speeds or prolonged friction. Use the right blade specifically for plastics and maintain a moderate cutting speed. Pause intermittently during long cuts to cool down the tools.
- Wrong Blade: A wrong or dull blade can cause chipping, rough edges, or even damage. Use fine-toothed or carbide-tipped blades for acrylic instead of a metal cutting blade. Inspect the blade before use for sharpness and damage. Avoid wood-cutting or metal-cutting blades, as they can generate excessive friction.
- No Guide or Clamp: Failing to secure plexiglass properly can result in slipping, uneven edges, and potential accidents. Always clamp firmly to a stable surface. Use edge guides with tools like jigsaws or circular saws for straight cuts. Employ multiple clamps to ensure stability across the entire sheet.
- Cutting Too Quickly: Rushing the process may lead to jagged edges with reduced control. Quick cuts also increase overheating. Work at a steady pace to let the tool glide naturally. Apply light and uniform pressure to avoid forcing. Take your time with intricate shapes or tight curves for precision.
Conclusion
Mastering the art of cutting plexiglass is no simple task, especially for beginners. You’re to select the right tools, measurements, and techniques. It’s the same for all, whether scoring with a utility knife for thin sheets, precision cuts with a table saw, or creating intricate designs with a jigsaw. Never forget your safety gear, such as wearing glasses, securing the material, and working in a ventilated space, which can save you unwanted troubles.
Enjoy The Best Possible Professional Cuts at JUMEI ACRYLIC
Large-scale projects will require extensive tools, advanced technologies, and optimum tolerance. That’s where you should consult a professional acrylic plexiglass service.
Jumei Acrylic Manufacturing excels in the global competition through industry-leading metrics, from tools to methods and experience. Contact us to drop your project ideas/specifications/problems for top suggestions/recommendations from our experts.


